
Lighting decides whether a Unity scene looks like a game or like a grey prototype, and it’s also where a lot of people give up. Lightmaps come out blotchy, objects go black, the editor bakes for an hour, and dynamic characters look pasted on top of the world. This guide explains Unity lighting in Unity 6 with URP from the ground up: realtime vs baked vs mixed lights, global illumination, lightmap UVs, light probes and Adaptive Probe Volumes, reflection probes, settings that make bakes fast, and fixes for the problems everyone hits.
Quick answer
Bake lighting for everything that doesn’t move and use realtime only for lights that change. To bake: mark static geometry Contribute GI, tick Generate Lightmap UVs on imported models, set lights to Baked or Mixed, then open Window > Rendering > Lighting and click Generate Lighting. Use light probes (or Adaptive Probe Volumes) so moving characters pick up the baked light.
Realtime, Baked and Mixed Lights
Every Light component has a Mode setting. It’s the most important lighting decision in the project:
| Mode | How it works | Pros | Cons |
|---|---|---|---|
| Realtime | Calculated every frame | Can move, change colour, turn on/off; lights moving objects perfectly | Costs GPU time per light; no bounced light on its own |
| Baked | Pre-calculated into lightmap textures in the editor | Nearly free at runtime; soft shadows and bounced light | Can’t change at runtime; doesn’t light moving objects directly |
| Mixed | Indirect (bounced) light baked, direct light realtime or partly baked | Best of both: bounce lighting plus dynamic shadows on characters | More settings to understand; more memory |
Objects also have a role. In the Mesh Renderer, Contribute Global Illumination (shown by ticking Static > Contribute GI in the Inspector header) means the object is included in the bake and receives lightmaps. Objects that move (characters, doors, pickups) must not be GI-static; they’re lit by probes instead.
What Global Illumination Does
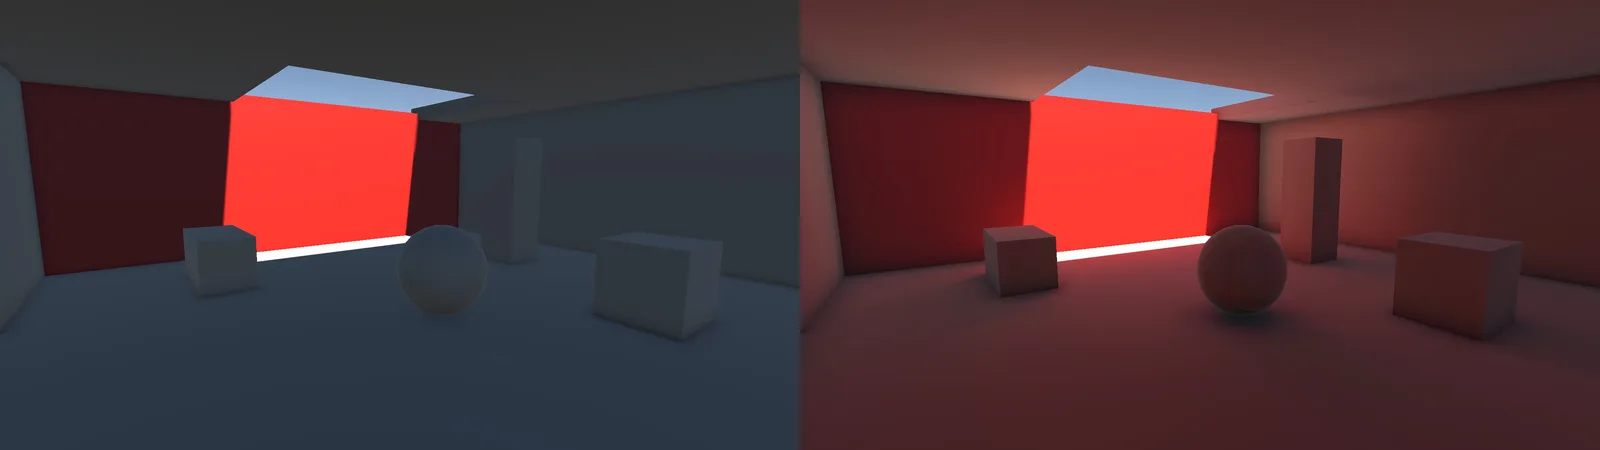
Direct light is light travelling straight from a lamp to a surface. In the real world, light then bounces: sunlight hitting a red wall tints the floor next to it, and a room lit by one window isn’t pitch black in the corners. That bounced light is global illumination (GI).
Realtime lights in URP don’t calculate bounces at all. Without GI, every surface not hit by a light shows only ambient light, which is why unlit sides of objects look flat and corners look fake. Baked GI simulates the bounces offline with a path tracer (the Progressive Lightmapper, GPU or CPU) and stores the result in lightmaps and probes. This is the single biggest visual upgrade you can make to a static scene.
Your First Bake, Step by Step
- Mark static geometry. Select walls, floors, buildings and big props and tick Static (at least Contribute GI).
- Give meshes lightmap UVs. Lightmaps need a second, non-overlapping UV set. For imported models, select the model asset and tick Generate Lightmap UVs in the Model tab of the import settings, then Apply. ProBuilder meshes and Unity primitives already have them.
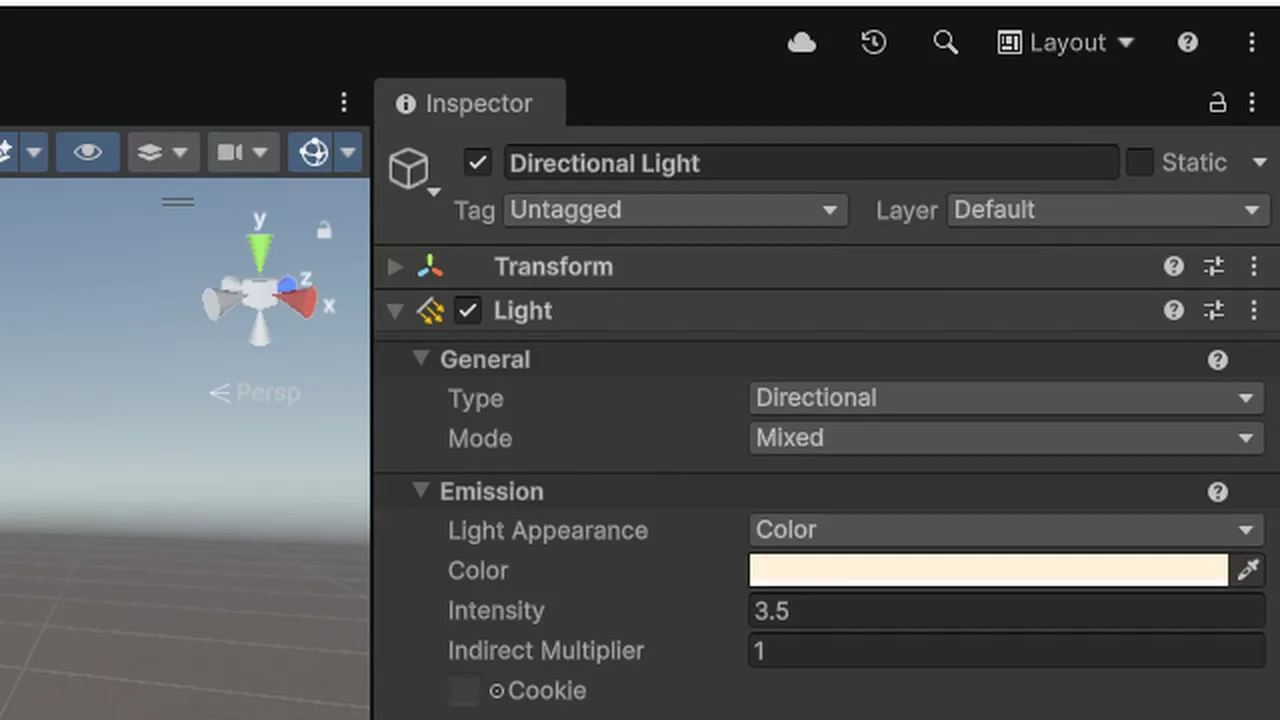
- Set the lights. Change your Directional Light (the sun) to Mixed and indoor lamps that never change to Baked.
- Open the Lighting window (Window > Rendering > Lighting). If the scene has no Lighting Settings asset, click New Lighting Settings.
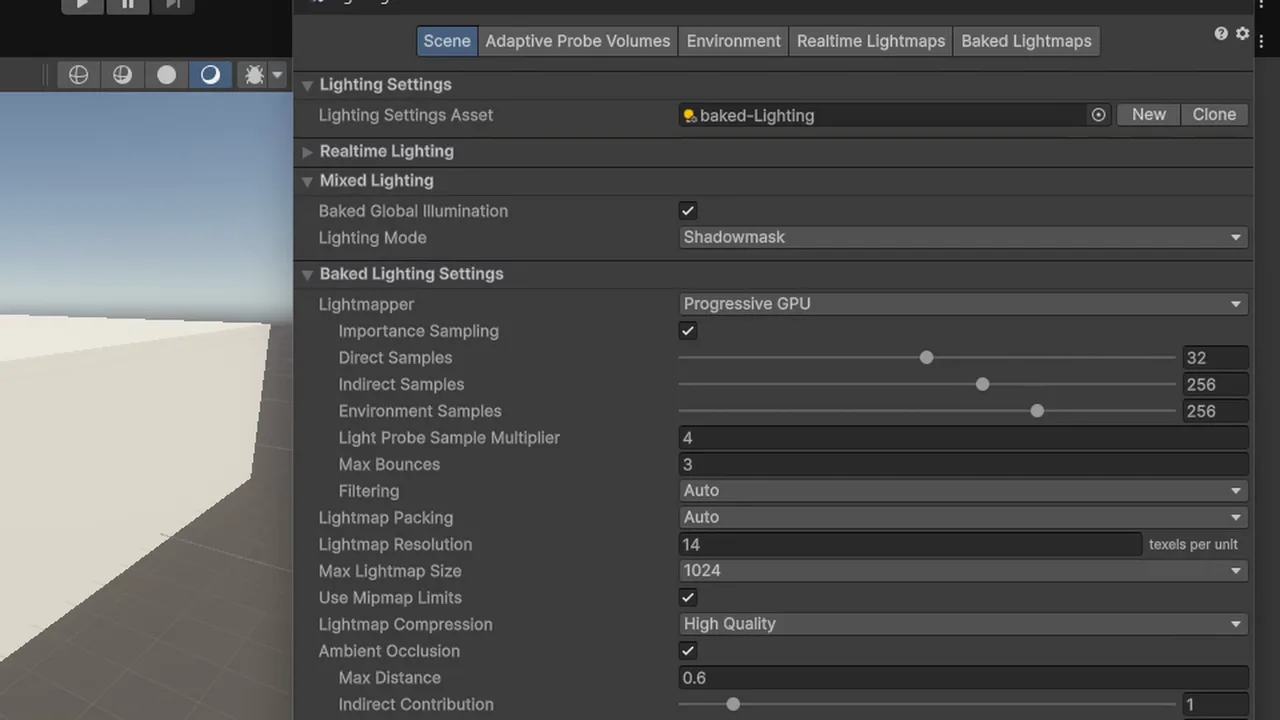
- Under Mixed Lighting, keep Baked Global Illumination ticked and Lighting Mode on Shadowmask or Baked Indirect (explained below).
- Under Lightmapping Settings, choose Progressive GPU if you have a decent graphics card, and start with low quality values for a quick preview (see the settings table).
- Click Generate Lighting. The progress bar at the bottom right shows the bake.
When it finishes, the scene gets a folder next to it containing the lightmaps and a Lighting Data asset. Commit these with the scene; they’re what builds use. The Scene view draw mode dropdown (top left of the Scene view) has Baked Lightmap and UV Charts views that show exactly what was baked and at what resolution.
Mixed Lighting Modes
The Lighting Mode under Mixed Lighting controls what a Mixed light bakes:
- Baked Indirect: only the bounced light is baked. Direct light and all shadows stay realtime. Looks great, shadows are always correct, but you pay for realtime shadows up to the shadow distance.
- Shadowmask: bounced light and static shadows are baked into a shadowmask texture. Moving objects still cast realtime shadows. Static shadows remain beyond the realtime shadow distance, which is great for open areas. A good default for most URP projects.
- Subtractive: everything from the main light is baked, and moving objects get one cheap realtime shadow that darkens the lightmap. The cheapest option, aimed at low-end mobile, with the least accurate result.
For URP, also make sure your URP Asset allows what you need: Lighting > Mixed Lighting must be enabled, and for Shadowmask the asset’s settings must support it. If baked shadows never appear, this is often why.
Light Probes and Adaptive Probe Volumes
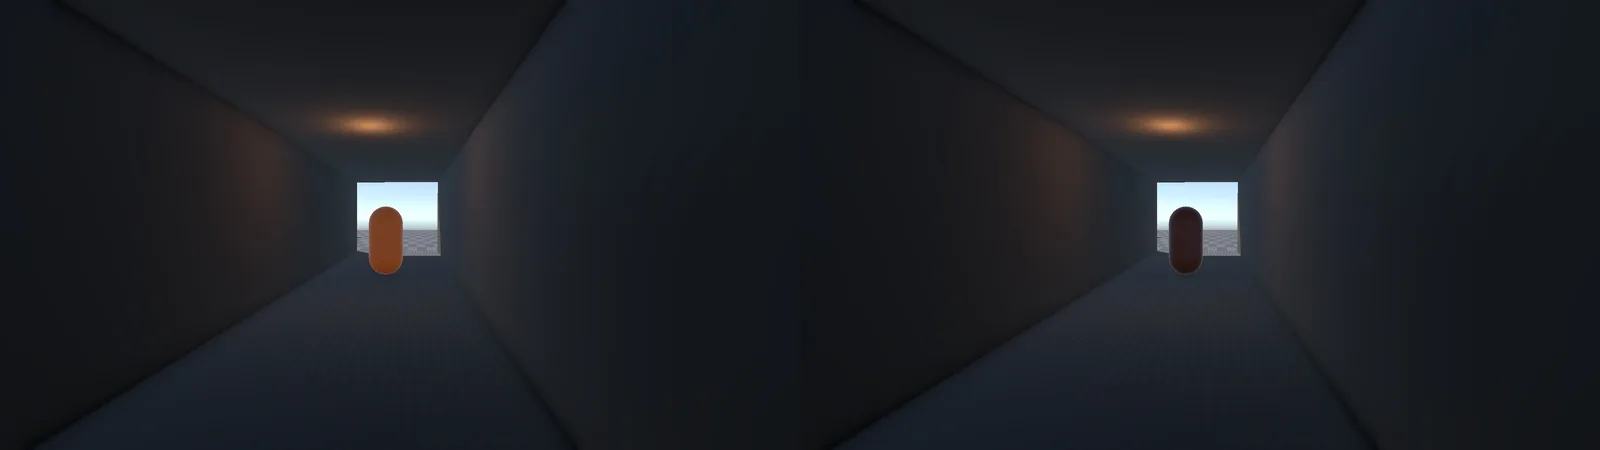
Lightmaps only work on static objects. A character walking from a bright courtyard into a dark corridor needs to pick up that change too, otherwise it glows unnaturally in the dark. Probes solve this by sampling baked light at points in space; moving objects blend between the nearest samples.
Unity 6 offers two systems:
- Light Probe Groups: you place probes by hand (GameObject > Light > Light Probe Group). Put more where lighting changes (doorways, shadow edges) and fewer in open uniform areas. Fine for small scenes, tedious for big ones.
- Adaptive Probe Volumes (APV): available in URP and HDRP in Unity 6. You add a volume around the area, and Unity places probes automatically with density adapting to geometry. Lighting is sampled per pixel rather than per object, so large objects get correct gradients. Enable it in the URP Asset (Lighting > Light Probe System > Adaptive Probe Volumes), then add an Adaptive Probe Volume (Global mode covers the whole scene) and bake.
APV also supports lighting scenarios (for example day and night bakes you blend between) and can light small static props without lightmaps: set their Mesh Renderer’s Receive Global Illumination to Light Probes. That saves lightmap space and bake time on clutter such as rocks and crates.
Reflection Probes
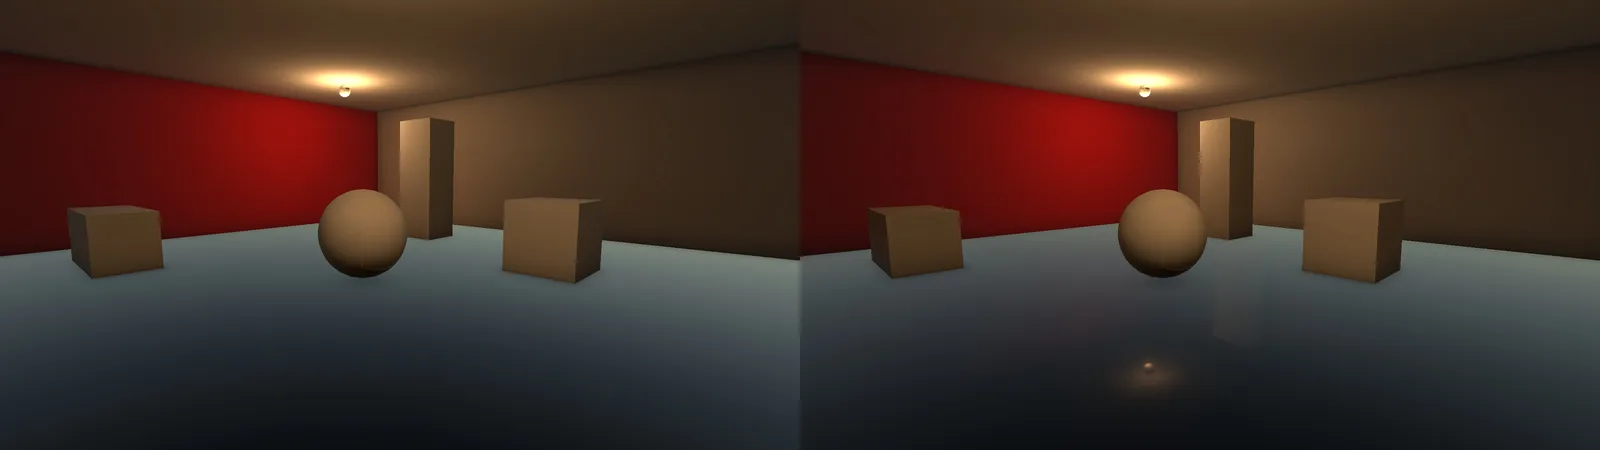
Metallic and glossy surfaces reflect their surroundings. By default they reflect only the skybox, which looks wrong indoors: shiny floors reflect a blue sky inside a dark dungeon. Add a Reflection Probe (GameObject > Light > Reflection Probe) to each distinct area, set its box to cover the room, and bake it with the rest of the lighting. Keep Type on Baked unless something really needs live reflections; realtime probes re-render the scene six times per update.
In URP, tick Box Projection on indoor probes so reflections line up with walls, and enable probe blending in the URP Asset so objects crossing between rooms don’t pop.
💻 GPU baking needs a GPU
The Progressive GPU lightmapper can be ten times faster than the CPU one, but only with a capable graphics card and enough VRAM. Our laptop picks list GPUs that bake well at each budget.
Lightmapping Settings That Matter
Most settings can stay at their defaults. These make the biggest difference to quality and bake time:
| Setting | What it does | Preview bake | Final bake |
|---|---|---|---|
| Lightmap Resolution | Texels per unit. The biggest factor in bake time and memory | 5–10 | 20–40 (lower for large outdoor areas) |
| Direct / Indirect Samples | Rays traced per texel. Low values look noisy | 16 / 128 | 32–64 / 512–1024 |
| Bounces | How many times light bounces | 1 | 2–3 |
| Filtering / Denoiser | Removes noise after baking | Auto | Auto (OptiX or OpenImageDenoise) |
| Lightmap Padding | Space between charts | 2 | 2–4 (raise if you see bleeding) |
| Max Lightmap Size | Size of each atlas texture | 1024 | 1024–2048 |
| Ambient Occlusion | Darkens creases and contact points | Off | On, small distance |
You can also scale resolution per object with Scale In Lightmap on its Mesh Renderer. Give floors near the player full resolution and distant buildings or rooftops 0.2–0.5. Tiny props are better lit by probes than lightmaps.
Lighting Recipes by Game Type
- Outdoor day scene: one Directional Light on Mixed with Shadowmask, a procedural or HDRI skybox as the environment source, APV for dynamic objects, a soft post-processing setup with tonemapping. Our post-processing guide covers the Volume side.
- Indoor level: sun on Mixed, interior lamps on Baked, emissive materials set to Global Illumination: Baked so glowing panels light the room, a reflection probe per room, higher lightmap resolution.
- Day/night cycle: baking can’t follow a moving sun. Use a realtime directional light and realtime ambient, or bake two APV scenarios and blend between them.
- Mobile: bake as much as possible, Subtractive or Baked Indirect, one realtime shadow at most, low shadow distance, compressed lightmaps.
- Procedural levels: you can’t bake rooms that don’t exist yet. Bake each room as a prefab-scene, or rely on realtime lighting plus SSAO and good ambient settings.
Troubleshooting
Lightmaps look blotchy or noisy
Too few indirect samples, or the denoiser is off. Raise Indirect Samples, enable filtering, and check that the object’s lightmap UVs aren’t tiny (the UV Charts view shows chart size).
Black or dark seams and splotches on models
Missing or overlapping lightmap UVs. Tick Generate Lightmap UVs on the model import, or increase Lightmap Padding. Back-facing or inside-out geometry also produces black texels; check normals.
Light leaking through walls and corners
Walls are too thin relative to the lightmap texel size, or the geometry has gaps. Make walls thicker than one texel, close gaps, or raise resolution on those objects.
Characters glow in dark areas
No probes, or probes not baked. Add a Light Probe Group or Adaptive Probe Volume covering the play area and re-bake. Make sure the character’s renderer uses Light Probes (the default for non-static objects).
The scene is darker in the build than in the Editor
Lighting was never generated, so the Editor showed an auto-preview that isn’t saved. Generate lighting and commit the Lighting Data asset. Also check that a scene loaded additively is set as the active scene so its lighting settings apply.
Baking takes forever
Lower Lightmap Resolution first (it has the biggest effect), use the GPU lightmapper, remove small props from the bake by lighting them with probes, and lower Scale In Lightmap on large distant objects.
Baked shadows don’t appear in URP
Mixed Lighting is disabled in the URP Asset, the light isn’t set to Mixed or Baked, or the objects aren’t marked Contribute GI. Check all three, then re-bake.
FAQ
Should I use baked or realtime lighting in Unity?
Bake lighting for anything that doesn’t move, and use Mixed lights so moving objects still get realtime shadows. Use pure realtime only for lights that change, such as day/night cycles or flashlights.
What are Adaptive Probe Volumes?
A Unity 6 URP/HDRP system that places light probes automatically and samples them per pixel, replacing hand-placed Light Probe Groups for most scenes. It also supports blending between baked lighting scenarios.
Why are my lightmaps black?
Usually missing lightmap UVs, objects not marked static, or the light set to Realtime. Enable Generate Lightmap UVs, tick Contribute GI and set lights to Baked or Mixed.
What is the difference between Shadowmask and Baked Indirect?
Baked Indirect bakes only bounced light and keeps all shadows realtime. Shadowmask also bakes static shadows, so they persist beyond the realtime shadow distance and cost less.
Do I need lightmaps for small props?
No. Lighting small props with probes saves lightmap memory and bake time with little visual difference. Set Receive Global Illumination to Light Probes.
Why does my bake take hours?
Lightmap Resolution is usually too high. Halving it roughly quarters the texel count. Use the GPU lightmapper and preview with low samples before the final bake.
Reader questions
Asked by readers of this article and answered by AI. Behavior can differ between Unity versions, so test in yours.
Leave a Reply