
Few things sell an impact like a ragdoll: an enemy that crumples realistically when hit, or a character that tumbles down stairs. Unity has a built-in Ragdoll Wizard that creates the physics setup in a minute, but making a ragdoll that switches on cleanly from animation, doesn’t explode, and can get back up takes a bit more. This Unity ragdoll tutorial covers creation, switching between animation and physics, applying hit forces, fixing jittery and exploding ragdolls, and blending back to animation.
How a Ragdoll Works
A ragdoll is a set of Rigidbodies and Colliders on the bones of a skinned character, connected by CharacterJoints that limit how far each bone can bend. When enabled, physics moves the bones and the skinned mesh follows. When disabled (kinematic), the Animator drives the bones as usual.
The key idea: the ragdoll lives on the character all the time. You just flip it between kinematic (animated) and dynamic (physics).
Creating a Ragdoll With the Ragdoll Wizard
- Import a humanoid character with a proper skeleton (Mixamo characters work well) and put it in the scene in a T-pose or A-pose if possible.
- Open GameObject > 3D Object > Ragdoll…
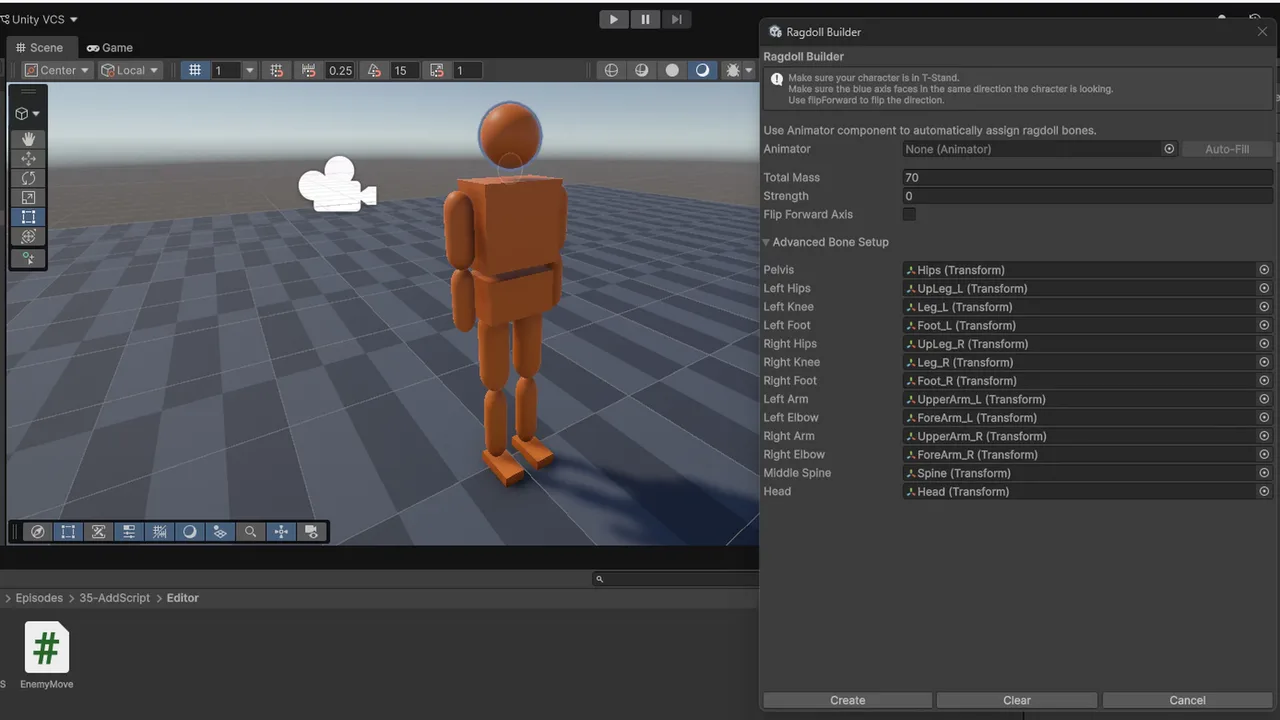
- Drag bones from the Hierarchy into each field: Pelvis (Hips), Left/Right Hips (UpperLeg), Knees (Leg), Feet, Arms (Arm), Elbows (ForeArm), Middle Spine (Spine1 or Spine2) and Head.
- Set Total Mass (around 70 for an adult) and click Create.
The wizard adds a Rigidbody, a Collider and (except on the pelvis) a CharacterJoint to each bone. Press Play with the Animator disabled and the character should collapse.
The most common wizard mistake is mixing up left and right, or assigning the UpperArm twist bone instead of the main arm bone. If limbs flail strangely, recheck the assignments.
Tuning Colliders and Joints
The wizard’s guesses are rough. Select each bone and adjust in the Scene view:
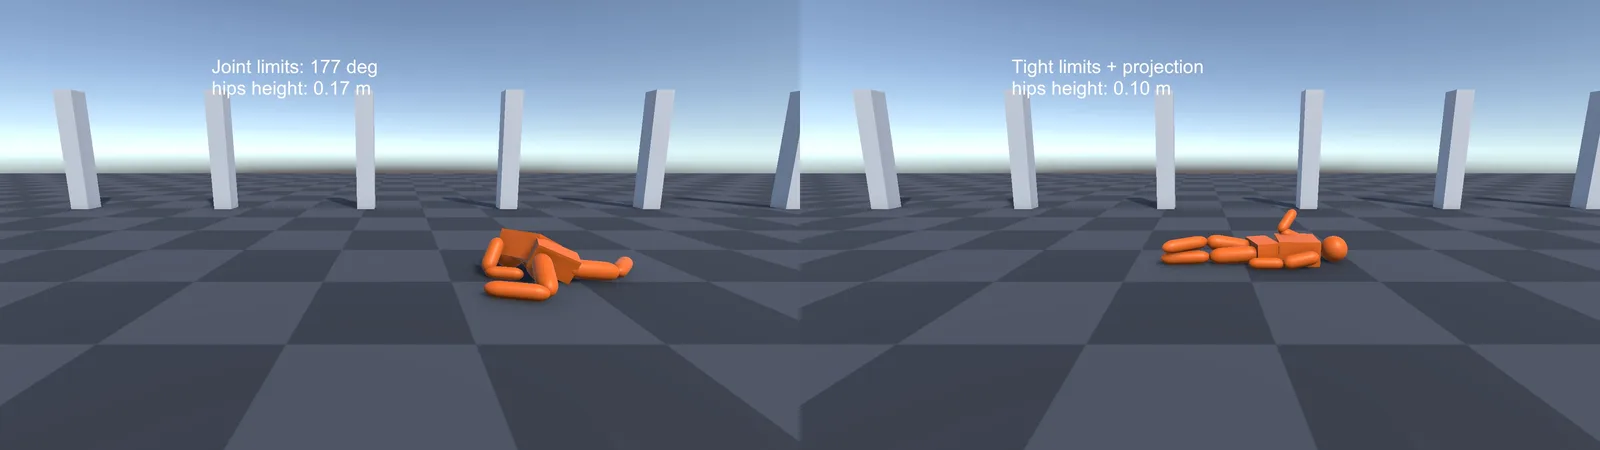
- Colliders should roughly match the limb volume and not overlap heavily. Overlapping colliders push against each other and cause jitter. Shrink them slightly.
- CharacterJoint limits: tighten twist and swing limits for knees and elbows (they should mostly bend one way). Loose limits produce unnatural poses.
- Tick Enable Projection on joints to stop limbs stretching apart under strong forces, and enable Enable Preprocessing only if stability is fine without it.
- On each Rigidbody, set Collision Detection: Continuous Speculative or Continuous for fast impacts, and Interpolate for smooth visuals.
Put all ragdoll bones on a Ragdoll layer and, in the Layer Collision Matrix, decide what it hits. Ragdoll vs the character’s own CharacterController should be off (see our collision layers guide).
Switching Between Animation and Ragdoll
Collect the ragdoll’s bodies and colliders once, then toggle them:
using UnityEngine;

public class RagdollController : MonoBehaviour
{
    [SerializeField] Animator animator;
    [SerializeField] Collider mainCollider;          // capsule / CharacterController used while alive
    [SerializeField] Rigidbody hips;
    Rigidbody[] bodies;
    Collider[] colliders;

    public bool IsRagdoll { get; private set; }

    void Awake()
    {
        bodies = hips.GetComponentsInChildren<Rigidbody>();
        colliders = hips.GetComponentsInChildren<Collider>();
        SetRagdoll(false);
    }

    public void SetRagdoll(bool on)
    {
        IsRagdoll = on;
        foreach (var rb in bodies)
        {
            rb.isKinematic = !on;
            rb.interpolation = on ? RigidbodyInterpolation.Interpolate : RigidbodyInterpolation.None;
        }
        foreach (var c in colliders) c.enabled = on;
        animator.enabled = !on;
        if (mainCollider) mainCollider.enabled = !on;
        if (TryGetComponent(out UnityEngine.AI.NavMeshAgent agent)) agent.enabled = !on;
    }
}
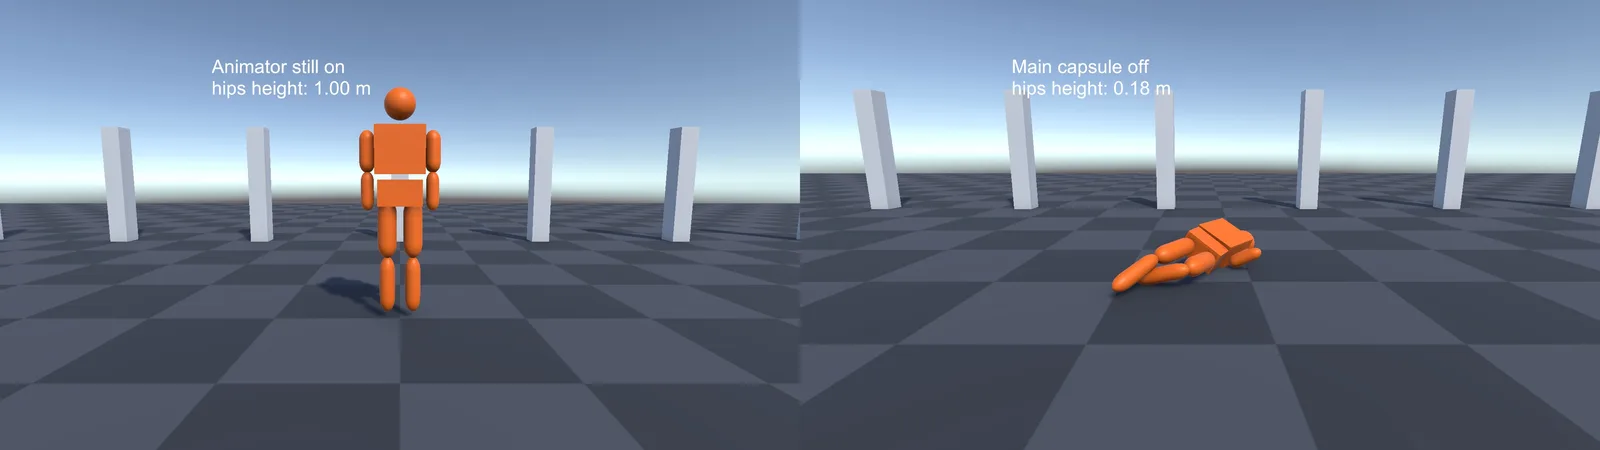
Disabling the bone colliders while alive stops them interfering with the main capsule and with raycasts. Alternatively, keep them enabled as precise hitboxes on a layer the capsule ignores, which lets you detect headshots. Disabling the Animator is essential: if it stays on, it snaps bones back every frame and the ragdoll appears frozen.
Applying Hit Forces
When an enemy dies from a hit, enable the ragdoll first, then push the bone that was hit:
public void Die(Rigidbody hitBone, Vector3 hitPoint, Vector3 force)
{
    SetRagdoll(true);
    // Inherit current movement so the body doesn't stop dead
    Vector3 vel = mainVelocity;   // e.g. from the CharacterController or agent
    foreach (var rb in bodies) rb.linearVelocity = vel;

    (hitBone ? hitBone : hips).AddForceAtPosition(force, hitPoint, ForceMode.Impulse);
}
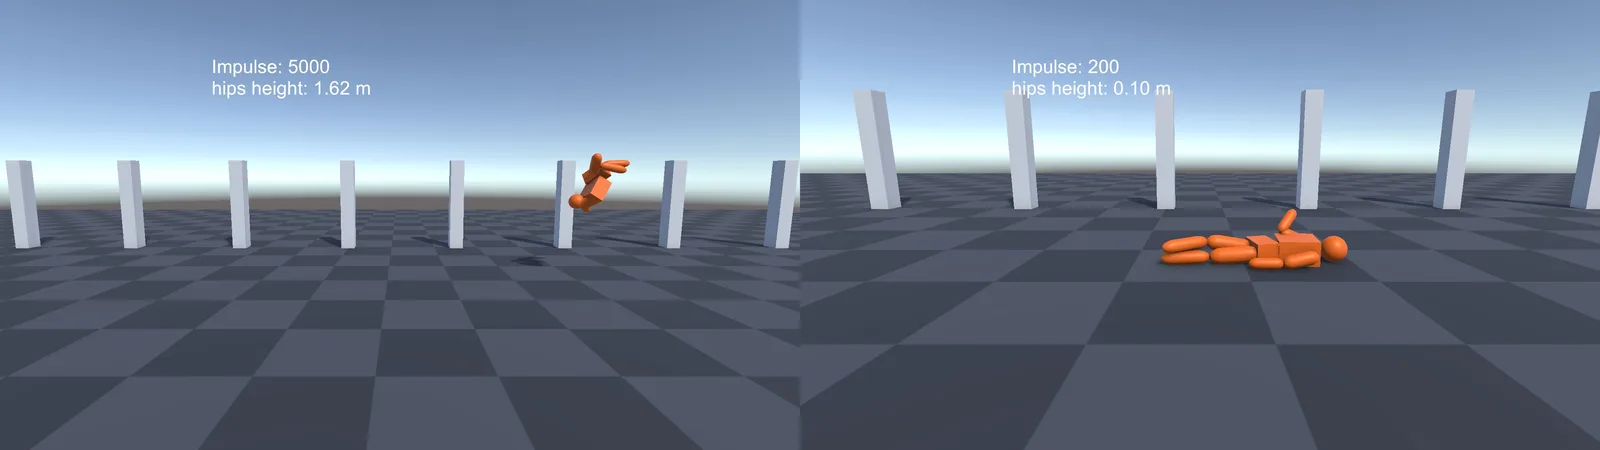
Get hitBone from a raycast’s hit.rigidbody (see our raycast tutorial). Impulses of 50–300 suit a 70 kg ragdoll. Huge values launch bodies across the map. For explosions, call rb.AddExplosionForce(force, center, radius, upwardsModifier, ForceMode.Impulse) on every bone.
Copying velocity matters: without it, a running enemy stops instantly then flops, which looks wrong.
Getting Back Up
To recover from ragdoll (knockdowns, physics-based games), you need to get the animated character to where the ragdoll ended up:
- Wait until the hips’ velocity is low (the body has settled).
- Move the root object to the hips’ position (keeping the hips in place visually), and rotate it to face the direction the body is lying.
- Decide face-up or face-down from the hips’ forward vector (
Vector3.Dot(hips.forward, Vector3.up)), and choose a matching get-up animation. - Over about 0.3 s, blend each bone from its ragdoll pose to the first frame of the get-up animation, then re-enable the Animator.
// Step 2: realign the root without moving the hips visually
Vector3 hipsPos = hips.position;
transform.position = new Vector3(hipsPos.x, GroundHeightAt(hipsPos), hipsPos.z);
hips.position = hipsPos;
Step 4 requires recording bone poses, which is the fiddly part. If you need robust get-ups and active ragdolls that balance and react, Asset Store tools like PuppetMaster are the standard choice (see our Asset Store roundup).
💻 Physics-heavy scenes slowing down?
Lots of ragdolls stress the CPU. If your machine struggles in the Editor, our dev laptop guide lists models with the CPU headroom for physics work.
Performance
- A ragdoll has 11 bodies and 10 joints. Dozens active at once is fine on desktop. On mobile, cap active ragdolls and freeze old ones.
- Once a ragdoll settles, set its bodies to kinematic (or let them sleep) so they cost almost nothing. Rigidbodies sleep automatically when still, unless something keeps nudging them.
- Remove or pool dead bodies after a while (see object pooling).
- Use the Profiler‘s Physics module to watch active bodies and contacts.
Troubleshooting
The ragdoll explodes or flies away when enabled
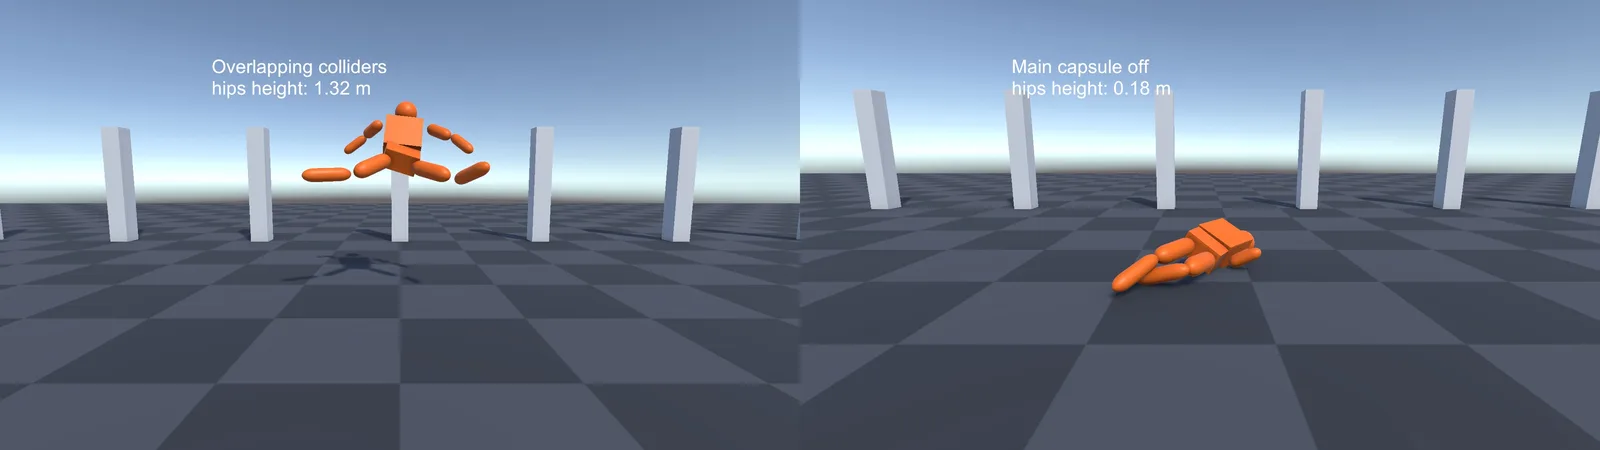
Bone colliders are overlapping each other or the main capsule, so physics violently separates them. Shrink colliders, disable the main collider when ragdolling, and put the ragdoll on a layer that doesn’t collide with the character’s own capsule.
The ragdoll doesn’t move at all
The Animator is still enabled and overwrites bones each frame, or the Rigidbodies are still kinematic.
Limbs stretch or bend backwards
Joint limits are too loose, or bones were assigned wrongly in the wizard. Tighten limits and enable projection.
Ragdoll jitters on the ground
Overlapping colliders, very light limbs (mass ratios over about 10:1 between connected bodies are unstable), or a low solver iteration count. Raise Default Solver Iterations in Physics settings to 10–12, or per body with rb.solverIterations.
The ragdoll falls through the floor
Fast-moving thin colliders tunnel through. Use Continuous collision detection on the bones and a thicker floor collider.
FAQ
How do I make a ragdoll in Unity?
Use GameObject > 3D Object > Ragdoll, assign the character’s bones, set the total mass and click Create. Then disable the Animator to let physics take over.
How do I switch from animation to ragdoll?
Disable the Animator and the main collider, and set the ragdoll’s Rigidbodies to non-kinematic.
Does a ragdoll work with a CharacterController?
Yes. Disable the CharacterController when ragdolling, and make sure ragdoll layers don’t collide with it while alive.
What is an active ragdoll?
A ragdoll that uses joint motors to try to match an animation, so it can balance and react to hits while staying physical. It’s used in games like Gang Beasts and often built with PuppetMaster.
Can I use ragdoll colliders as hitboxes?
Yes. Keep them enabled and kinematic on a hitbox layer, and use hit.rigidbody to find which body part was shot.
Reader questions
Asked by readers of this article and answered by AI. Behavior can differ between Unity versions, so test in yours.



Leave a Reply