
A good 2D camera is invisible: it keeps the action framed, looks ahead in the direction you’re moving, and never jitters. A bad one makes a great game feel cheap. This guide covers Unity 2D camera follow two ways: a short hand-written script with SmoothDamp, dead zones, look-ahead and level bounds, and the Cinemachine 3 setup that does most of it with no code. It also explains the jitter problems that catch nearly everyone.
The Simplest Follow Script
Put this on the Main Camera (orthographic) and drag your player into Target:
using UnityEngine;

public class CameraFollow2D : MonoBehaviour
{
    [SerializeField] Transform target;
    [SerializeField] Vector2 offset = new Vector2(0f, 1f);

    void LateUpdate()
    {
        transform.position = new Vector3(target.position.x + offset.x, target.position.y + offset.y, transform.position.z);
    }
}
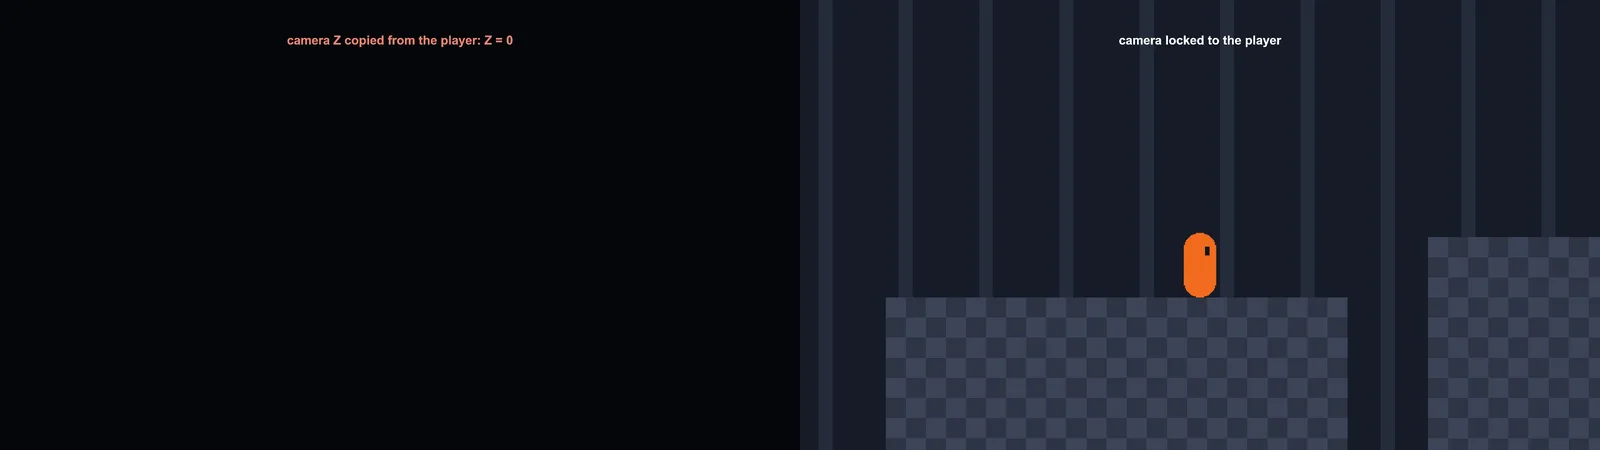
Two details matter. It runs in LateUpdate, after the player has moved this frame. And it keeps the camera’s Z (usually -10). If you copy the player’s Z of 0, the camera sits on the sprite plane and renders nothing, which is the classic “my screen went blank” bug.
Smoothing With SmoothDamp
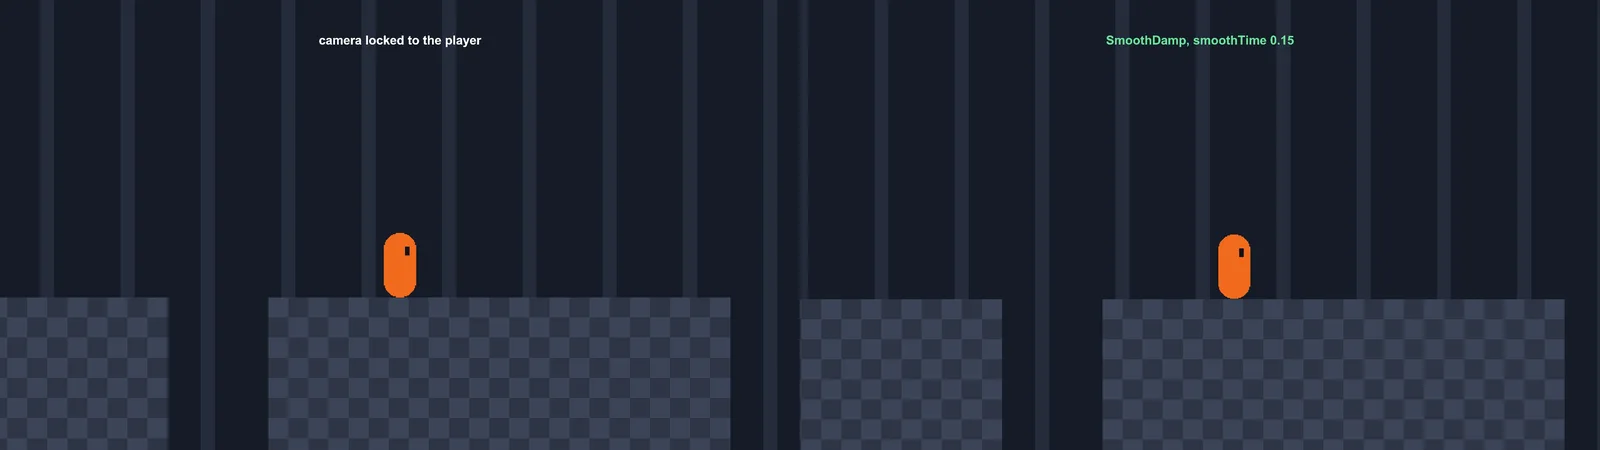
A rigidly locked camera feels harsh. Vector3.SmoothDamp adds a springy lag that’s framerate-independent:
[SerializeField] float smoothTime = 0.15f;
Vector3 velocity;

void LateUpdate()
{
    Vector3 desired = new Vector3(target.position.x + offset.x, target.position.y + offset.y, transform.position.z);
    transform.position = Vector3.SmoothDamp(transform.position, desired, ref velocity, smoothTime);
}
Use 0.1–0.25 s for most games. Many platformers smooth Y more than X (falls feel less nauseating), and you can do that with two Mathf.SmoothDamp calls and two velocity floats. Avoid the common Lerp(pos, target, 0.1f) pattern, which behaves differently at different frame rates (explained in our Lerp guide).
Look-Ahead and Dead Zones
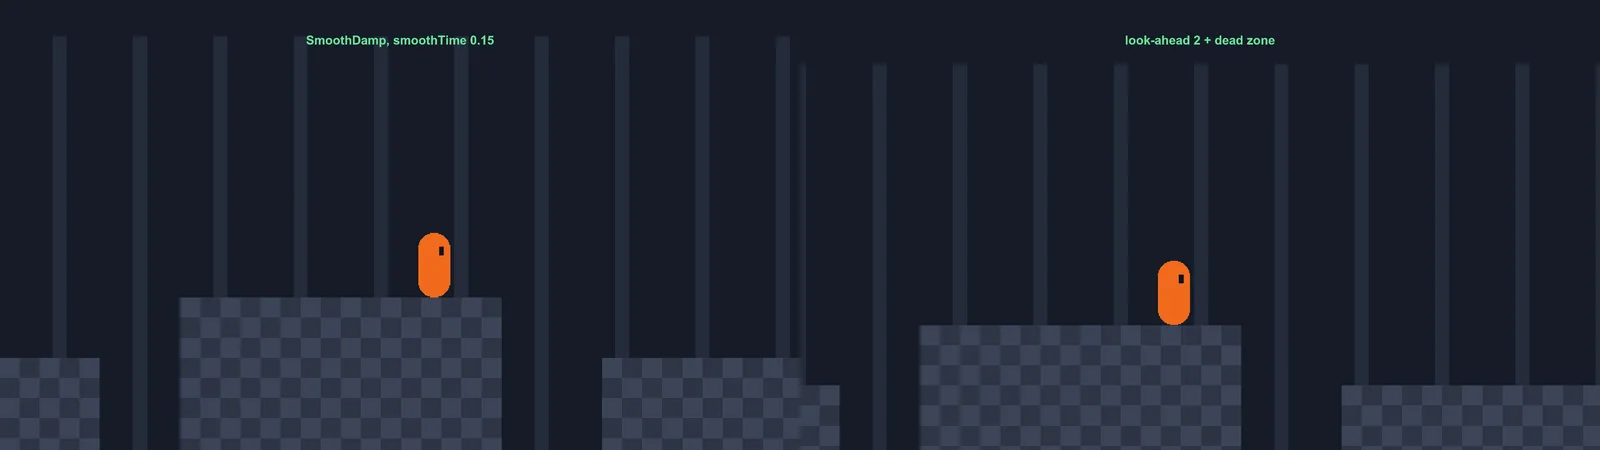
Look-ahead shifts the camera in the direction the player is moving, so they can see what’s coming. Dead zones let the player move a little without the camera moving at all, which stops constant tiny adjustments.
[SerializeField] Rigidbody2D targetBody;
[SerializeField] float lookAheadDistance = 2f;
[SerializeField] float lookAheadSmooth = 0.4f;
[SerializeField] Vector2 deadZone = new Vector2(0.5f, 1f);

float lookAheadX, lookAheadVel;
Vector3 focus;

void Start() => focus = target.position;

void LateUpdate()
{
    // Dead zone: only move the focus point when the target leaves the box
    Vector3 t = target.position;
    if (t.x > focus.x + deadZone.x) focus.x = t.x - deadZone.x;
    if (t.x < focus.x - deadZone.x) focus.x = t.x + deadZone.x;
    if (t.y > focus.y + deadZone.y) focus.y = t.y - deadZone.y;
    if (t.y < focus.y - deadZone.y) focus.y = t.y + deadZone.y;

    // Look-ahead based on horizontal speed
    float dir = Mathf.Abs(targetBody.linearVelocity.x) > 0.1f ? Mathf.Sign(targetBody.linearVelocity.x) : 0f;
    if (dir != 0f) lookAheadX = Mathf.SmoothDamp(lookAheadX, dir * lookAheadDistance, ref lookAheadVel, lookAheadSmooth);

    Vector3 desired = new Vector3(focus.x + lookAheadX + offset.x, focus.y + offset.y, transform.position.z);
    transform.position = Vector3.SmoothDamp(transform.position, desired, ref velocity, smoothTime);
}
Keeping the last look-ahead when the player stops (only updating when dir != 0) stops the camera swinging back to centre every time you pause.
Keeping the Camera Inside the Level
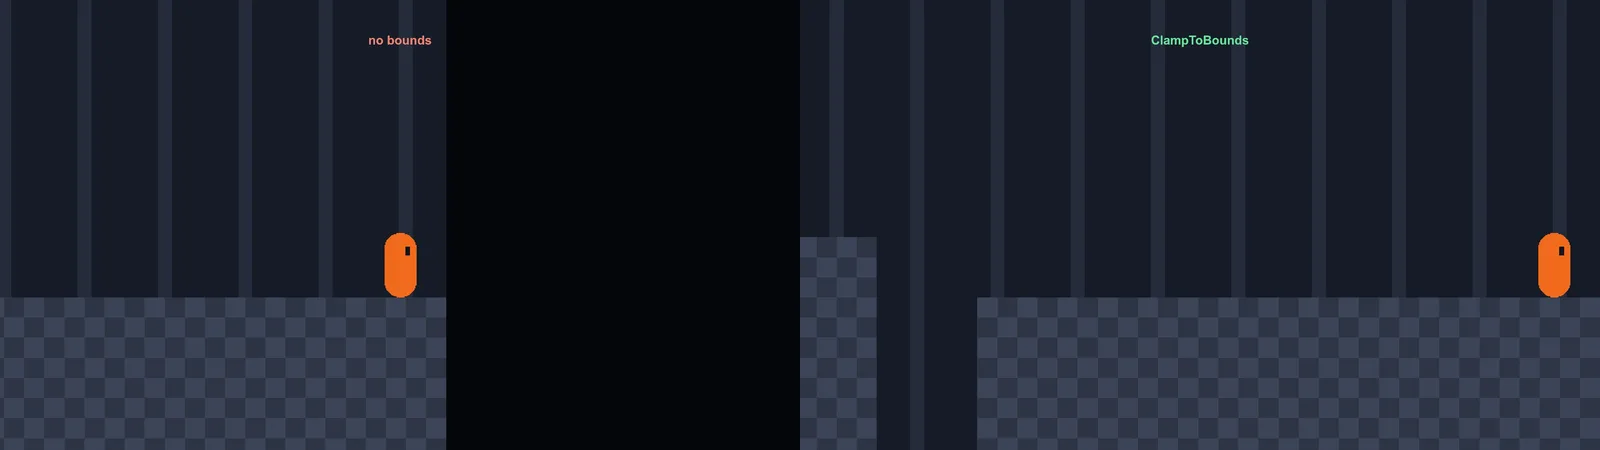
Clamp the camera so it never shows the empty void beyond your level. For an orthographic camera, the visible half-height is orthographicSize and the half-width is that times the aspect ratio:
[SerializeField] BoxCollider2D levelBounds;   // a trigger box covering the level
Camera cam;

void Awake() => cam = GetComponent<Camera>();

Vector3 ClampToBounds(Vector3 pos)
{
    float halfH = cam.orthographicSize;
    float halfW = halfH * cam.aspect;
    Bounds b = levelBounds.bounds;
    pos.x = Mathf.Clamp(pos.x, b.min.x + halfW, b.max.x - halfW);
    pos.y = Mathf.Clamp(pos.y, b.min.y + halfH, b.max.y - halfH);
    return pos;
}
Apply it to desired before SmoothDamp. If the level is smaller than the view, the min is larger than the max, so centre the camera on that axis instead.
The Cinemachine 3 Way
Cinemachine gives you all of the above as Inspector settings. Install Cinemachine from the Package Manager, then:
- GameObject > Cinemachine > Targeted Cameras > 2D Camera. This adds a CinemachineBrain to your Main Camera and creates a CinemachineCamera.
- Set Tracking Target to the player.
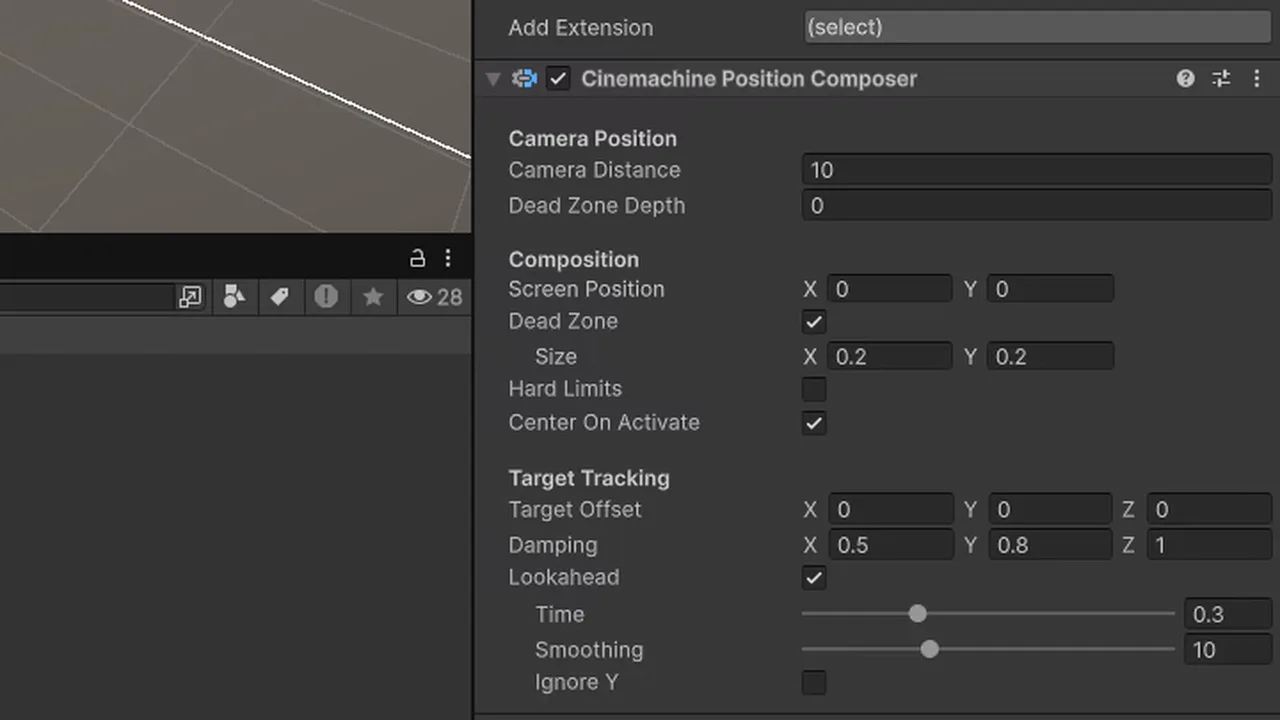
- In the Position Composer component: set Damping (X 0.5, Y 0.8 is a good start), turn on Dead Zone and size it, and set Lookahead Time to about 0.3 with Smoothing 10.
- For bounds, add a CinemachineConfiner2D extension and assign a PolygonCollider2D or CompositeCollider2D outlining the level. Click Invalidate Bounding Shape Cache if you change the shape at runtime.
| Feature | Custom script | Cinemachine |
|---|---|---|
| Setup time | 30 minutes | 5 minutes |
| Dead zone / look-ahead | Hand-coded | Built in, tweak live in Play mode |
| Non-rectangular bounds | Hard | Confiner2D handles polygons |
| Camera blends between areas | Hard | Priorities and blends built in |
| Full control / tiny footprint | Yes | Mostly |
For anything beyond a game jam, Cinemachine is usually the right call. It’s the same package covered in our Cinemachine 3 third-person guide, so the knowledge carries over to 3D.
Pixel-Perfect Cameras
For pixel art, add the Pixel Perfect Camera component (URP 2D) to the Main Camera. Set Assets Pixels Per Unit to match your sprites and a Reference Resolution such as 320×180. It snaps rendering to the pixel grid so sprites don’t shimmer while scrolling. With Cinemachine, add the CinemachinePixelPerfect extension too.
🖥️ Testing on a 60 Hz laptop?
Camera jitter often only shows at certain refresh rates. A machine with a decent high-refresh display helps you catch it before players do.
Camera Shake
With Cinemachine, add a CinemachineImpulseListener to the camera and a CinemachineImpulseSource to whatever explodes, then call impulseSource.GenerateImpulse(). With a custom script, add a decaying random offset after the follow calculation, so shake doesn’t feed back into the smoothing:
float shakeTime, shakeStrength;
public void Shake(float strength, float duration) { shakeStrength = strength; shakeTime = duration; }

// at the end of LateUpdate:
if (shakeTime > 0f)
{
    shakeTime -= Time.deltaTime;
    transform.position += (Vector3)(Random.insideUnitCircle * shakeStrength * shakeTime);
}
Because the shake is applied after SmoothDamp, store the unshaken position separately, or the camera drifts. The simplest fix is to put the shake on a child object of a “rig” that does the following.
Jitter and Other Problems
The player jitters while the background is smooth
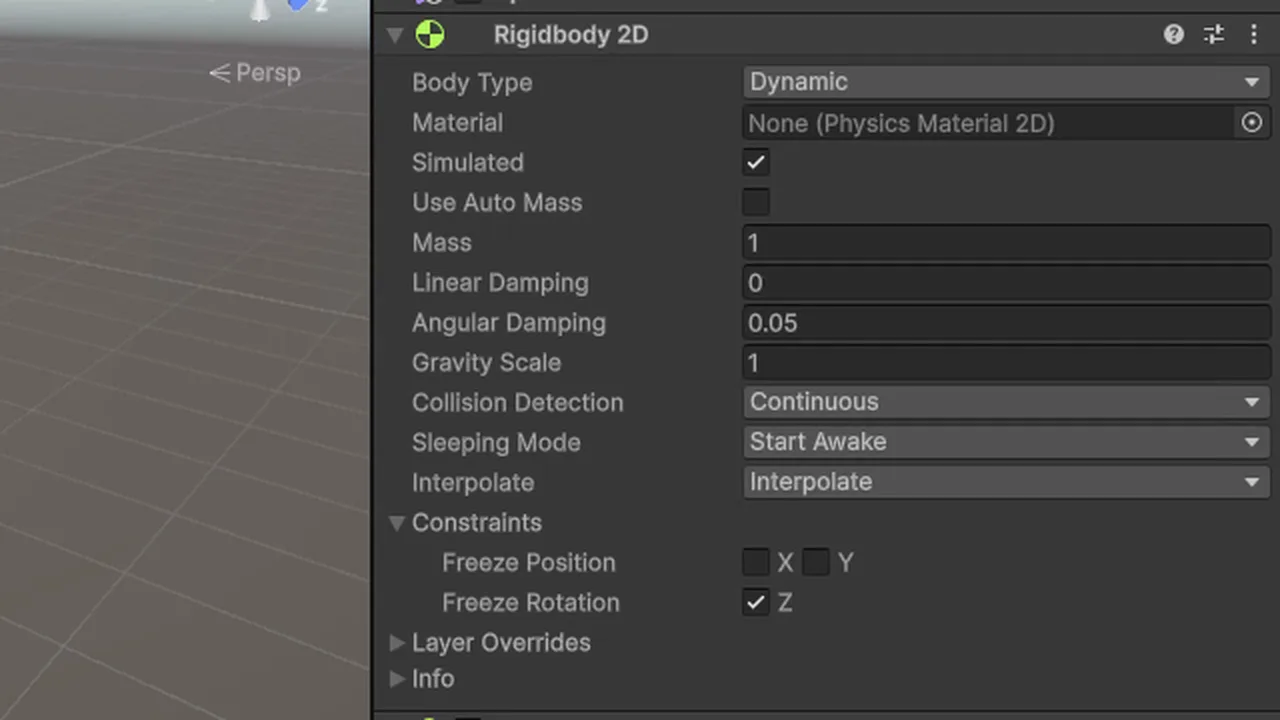
The player moves in FixedUpdate (physics) and the camera in LateUpdate (every frame), so they’re out of step. Turn on Interpolate on the player’s Rigidbody2D. This fixes the vast majority of 2D camera jitter. More in our Rigidbody jitter fix.
Background jitters while the player is smooth
The camera is updated in Update or FixedUpdate. Move it to LateUpdate. With Cinemachine, set the Brain’s Update Method to Smart Update or Late Update.
Screen is blank or shows only the background colour
The camera’s Z position equals the sprites’ Z. Keep the camera at Z = -10.
Pixel art shimmers when the camera moves
Use the Pixel Perfect Camera, set sprite Filter Mode to Point, and Compression to None.
Confiner2D doesn’t work
The bounding shape must be a 2D collider (often set as a trigger so it doesn’t block anything), and its Z position shouldn’t matter, but its shape must be large enough for the camera’s view. If the area is smaller than the view, the confiner centres the camera.
FAQ
Should a camera follow script use Update or LateUpdate?
LateUpdate, so it runs after all movement for the frame. Physics-moved targets also need Rigidbody interpolation.
Is Cinemachine good for 2D?
Yes. Its 2D Camera preset, Position Composer and Confiner2D cover dead zones, look-ahead and bounds with no code.
Why can’t I parent the camera to the player?
You can, but the camera inherits every movement and flip instantly, including rotation and scale flips used to face left, which can mirror the view.
How do I zoom a 2D camera?
Change orthographicSize, or the Lens Orthographic Size on a Cinemachine camera. Smaller values zoom in.
What is a good smoothTime for SmoothDamp?
Between 0.1 and 0.25 seconds for most 2D games. Lower feels tighter, higher feels floatier.
Reader questions
Asked by readers of this article and answered by AI. Behavior can differ between Unity versions, so test in yours.


Leave a Reply